Create an Ephemeral CI Pipeline for iOS with Jenkins and Orka
Jenkins is still the most popular open-source option in the world of CI/CD. It allows teams to automate all kinds of things, including macOS and iOS CI workflows. In light of this, MacStadium has created a Jenkins plugin for our flagship product, Orka, which offers genuine Apple hardware in the cloud. Orka is a unique, enterprise-ready Mac virtualization platform that utilizes Kubernetes and Docker under the hood and exposes certain features of these tools to end-users.
The Orka-Jenkins plugin allows users to provision both static and ephemeral macOS VM build agents in an Orka environment. Today, we’ll walk through the setup of an ephemeral system. To learn how to set up a static CI pipeline with the Orka-Jenkins plugin, check out Orka Integrations: Mac and iOS CI with the Orka-Jenkins Plugin.
Choosing a Home for the Jenkins Server
The Jenkins server can be run locally or directly in your Orka environment, but to set up GitHub webhook connectivity, you’ll need to expose the server on a publicly accessible IP. Moreover, if the Jenkins server is stood up outside of your Orka environment (perhaps as part of an existing workflow), there will need to be a VPN connection opened between the Jenkins server’s host and your Orka environment.
To demonstrate this today, we will stand up an AWS EC2 instance running Ubuntu 18.04, where we will install our Jenkins server and open a temporary VPN connection to our Orka environment to test our pipeline.
To support teams that wish to use a Jenkins server hosted outside of their MacStadium environment in production, we have site-to-site VPN connection documentation for all major cloud vendors.
Standing Up the Jenkins Server in AWS EC2
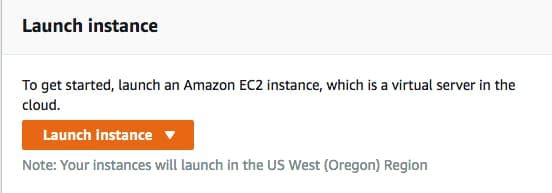
Log into the AWS console, navigate to EC2, and click Launch Instance.
Select Ubuntu 18.04 as the OS, and choose your preferred instance type.
Then, in the Configure Instance step, set Auto-assign Public IP to Enable, like so:

Next, run the following to identify the current IP addresses from which GitHub webhook calls will be made:
curl \
>   -H "Accept: application/vnd.github.v3+json" \
>   https://api.github.com/meta
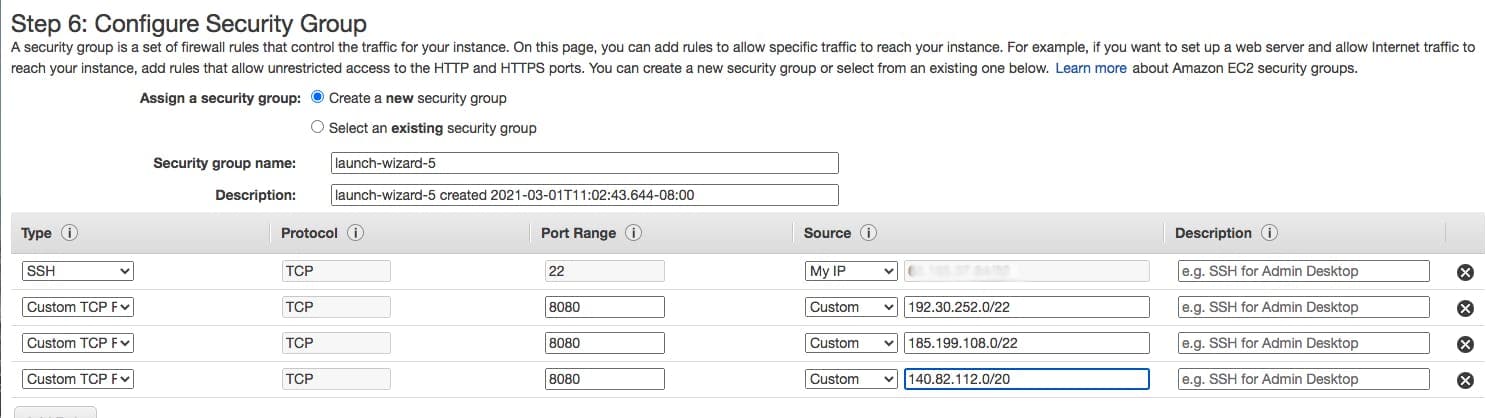
This will return a long list of IP addresses, but we’ll only be interested in those in the “hooks” group, which will look like this:
"hooks": [
   "192.30.252.0/22",
   "185.199.108.0/22",
   "140.82.112.0/20"
 ]
Then, you’ll need to click on Configure Security Group, where you’ll need to add a series of Custom TCP Rules with a Port Range of 8080 and a Source of each IP in the hooks group, like so:
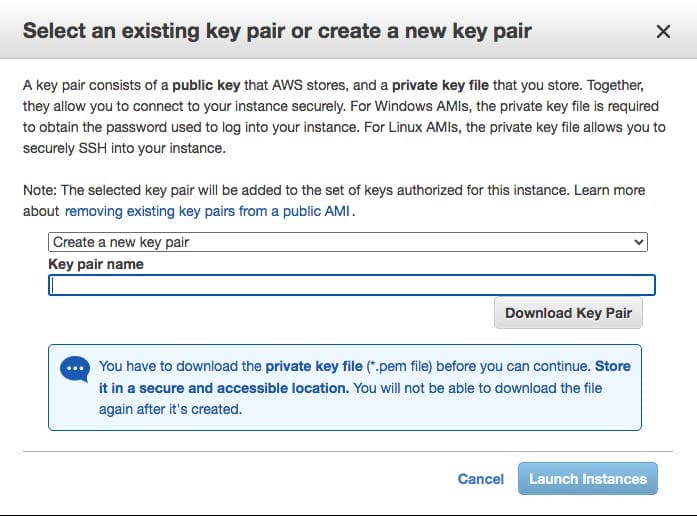
Finally, click Review and Launch, create and download your key pair as shown here, and click Launch Instance to start the EC2 instance.
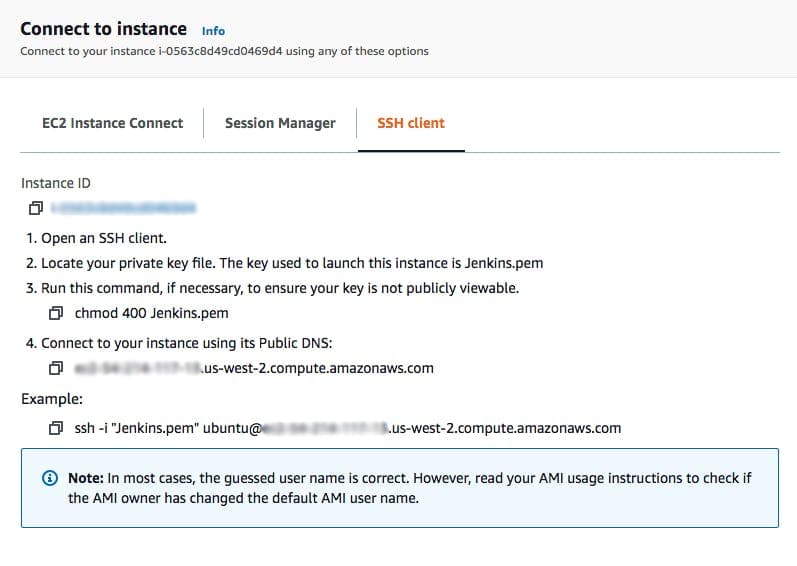
Once it's up, you’ll need to SSH into the EC2 instance. Click the Instances tab, and then click on your new instance. Click Connect, and then navigate to the SSH client tab in the view that appears. Follow these instructions to connect via SSH.
Once you’re in, install the Jenkins server by running the following commands:
sudo apt update
sudo apt install openjdk-8-jdk
wget -q -O - https://pkg.jenkins.io/debian/jenkins.io.key | sudo apt-key add -
sudo sh -c 'echo deb http://pkg.jenkins.io/debian-stable binary/ > /etc/apt/sources.list.d/jenkins.list'
sudo apt update
sudo apt install jenkins
systemctl status jenkins #check that it is up
If all goes well, you should then be able to navigate in your browser to your EC2 instance’s public IP at port 8080 and see Jenkins running.
NOTE: if you need to install a different version of Jenkins for some reason, be sure to install an LTS version of Jenkins, as the Orka plugin is supported only on LTS versions of Jenkins.
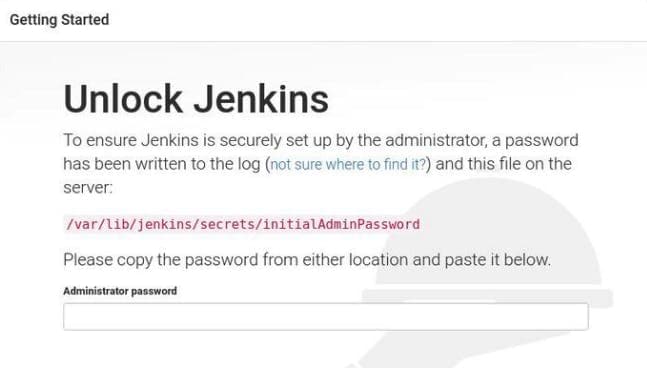
Run the following to retrieve your password:
sudo cat /var/lib/jenkins/secrets/initialAdminPassword
Finally, follow the on-screen prompts to create a user and install suggested plugins.
Installing the Orka-Jenkins Plugin
The simplest way to install a publicly available plugin for continuous integration, such as the Orka plugin, is to navigate to the web UI of a running Jenkins instance. From there, you can navigate to the Manage Jenkins/Manage Plugins view, click the Available tab, and search for "Orka." Once found, you can select it and click Install Without Restart to install it.
Configuring the Orka-Jenkins Plugin
To configure your Jenkins server to spin up ephemeral build agents in Orka, navigate in the Jenkins UI to
Manage Jenkins/Manage Nodes and Clouds and click on the tab to the left called Configure Clouds.
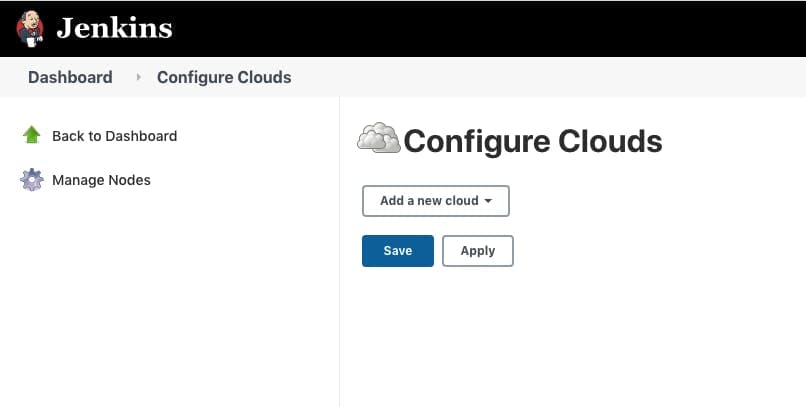
Click on the Add a new cloud dropdown, and select Orka Cloud. When you do so, the following form will be available:
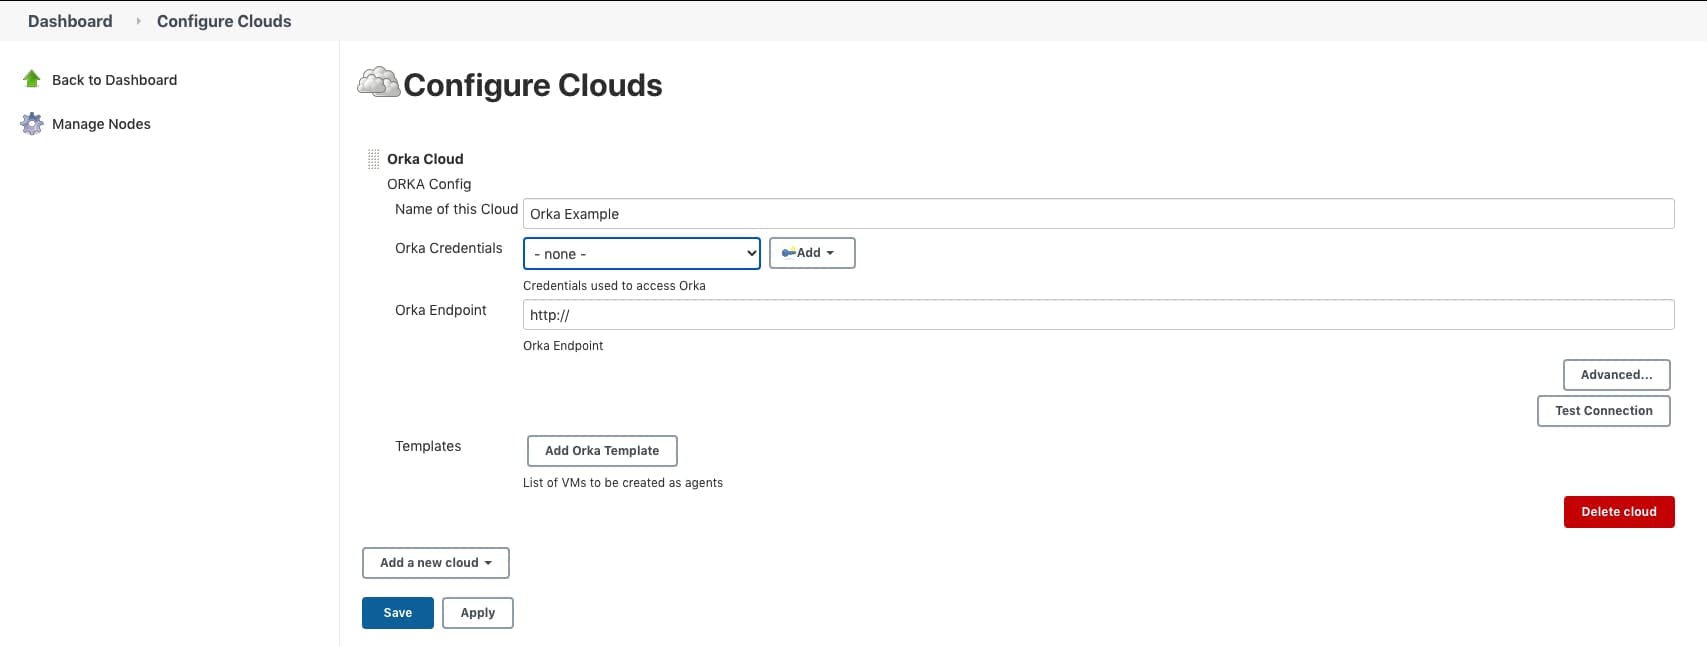
In the above view, you’ll need to enter a name for your cloud, your Orka credentials, and the endpoint for your Orka environment. Note that because a VPN connection is required to encrypt communications to your Orka environment, your Orka endpoint will use HTTP by default. If your team needs to use HTTPS, please contact MacStadium support to enable it.
Next, you’ll need to click Add Orka Template. When you do, you’ll see the following view appear:
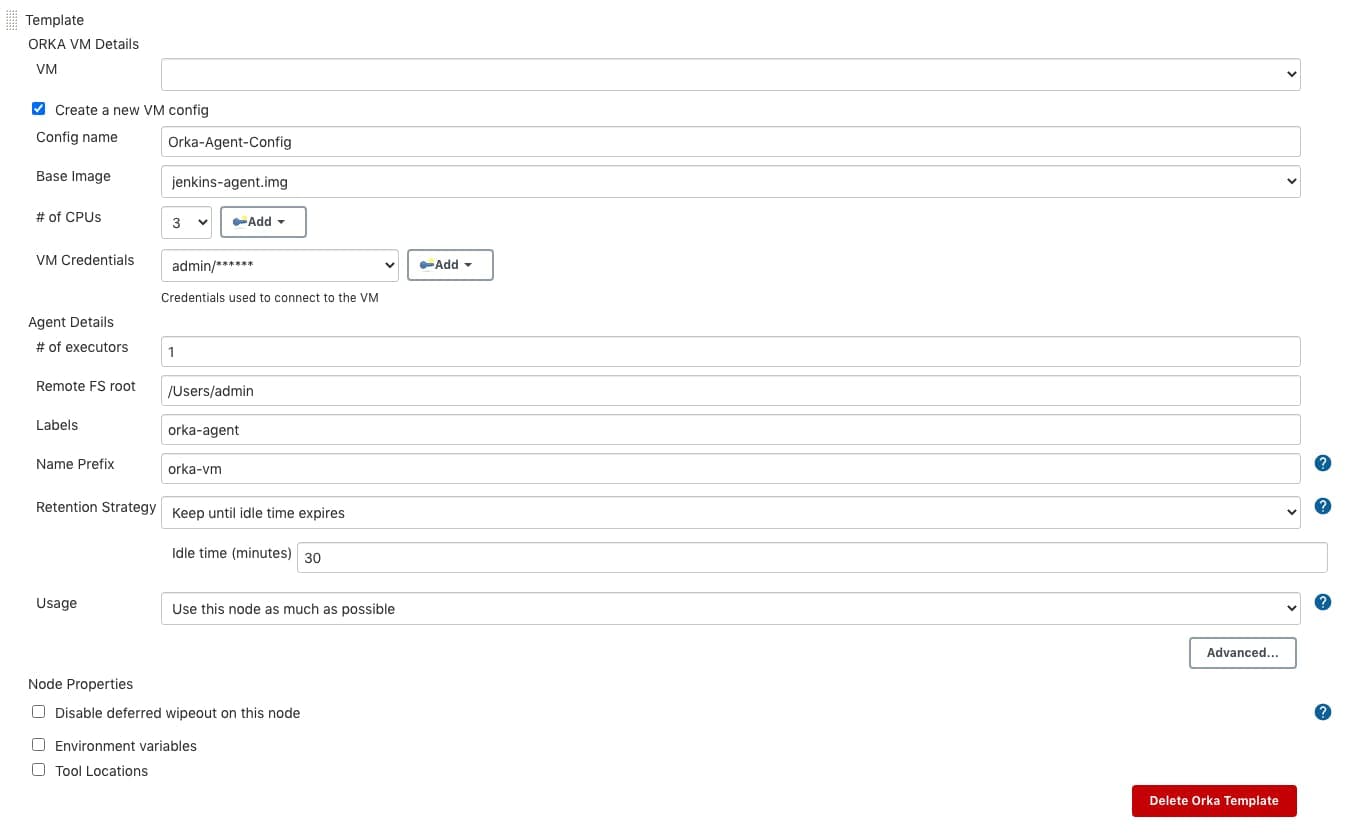
Note that you can either choose an existing VM to use as a template for ephemeral agents, or you can click the Create a new VM config checkbox and define your own. If you have not yet created a VM image configured for use as a Jenkins agent, you’ll need to define one.
To build your own Jenkins Agent image on a specific macOS version, you can begin by spinning up an Orka VM based on the OS image you need. SSH into the running VM and then install Homebrew, and then Java 8 by running:
brew tap adoptopenjdk/openjdk
brew install --cask adoptopenjdk8
And finally, save the VM’s current state as an image by running:
orka image save -v <VM_ID> -b <NEW_IMAGE_NAME> -y
Your new image will be available in the Base Image dropdown shown above.
In the Agent Details section of the Agent Template form, all fields are required. Note that in order to force Jenkins to spin up a new agent for a given job, you will need to set a label as well. In the above, we’ve set the label “orka-agent.”
Finally, click “Save” to save your new Cloud Configuration.
Create a Test Pipeline
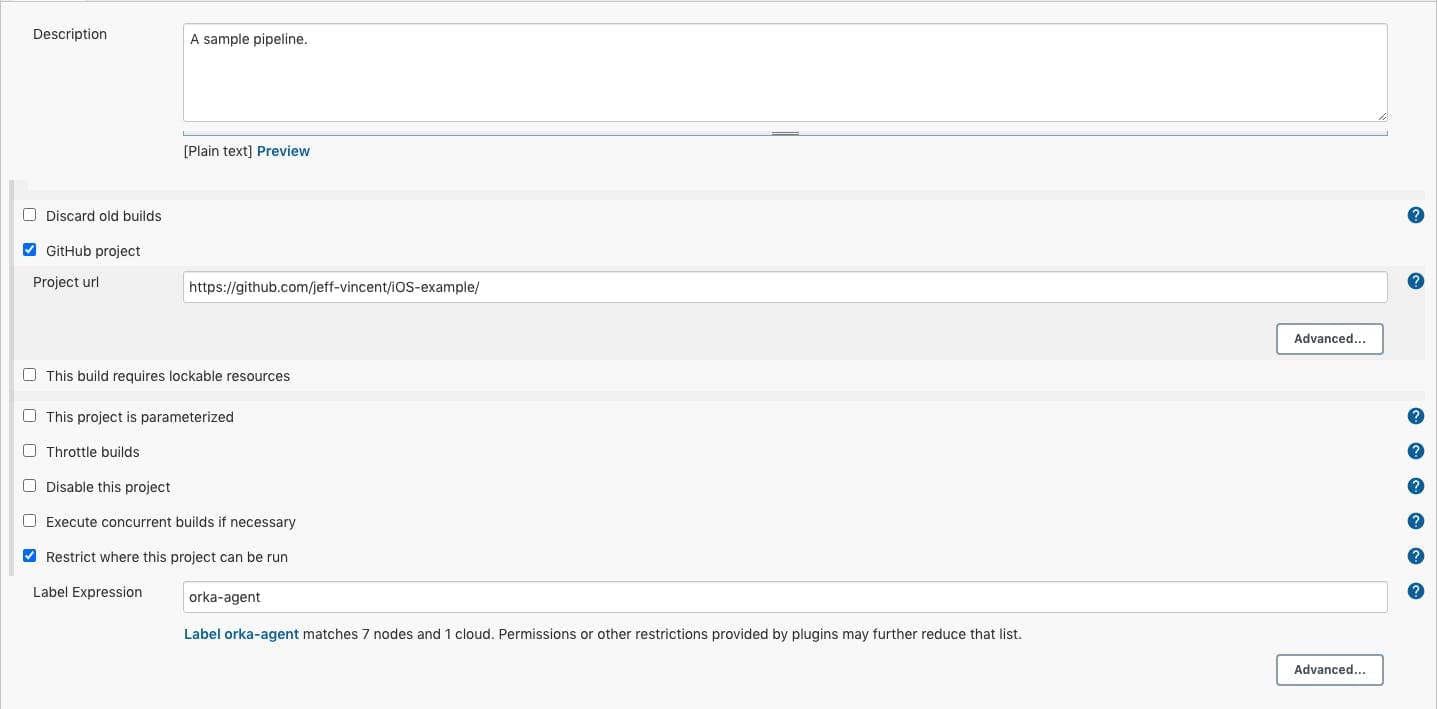
Begin by navigating to the Dashboard view and clicking New Item. Give your project a name, and select Freestyle project. When you do, you’ll be redirected to the following view. Once here, you’ll need to give your project a description, optionally set the GitHub project URL, and set a Label Expression for Jenkins to match when it looks for an appropriate agent to run a job in this pipeline. Note: we are using the label orka-agent, which we also set above in our Orka VM template.
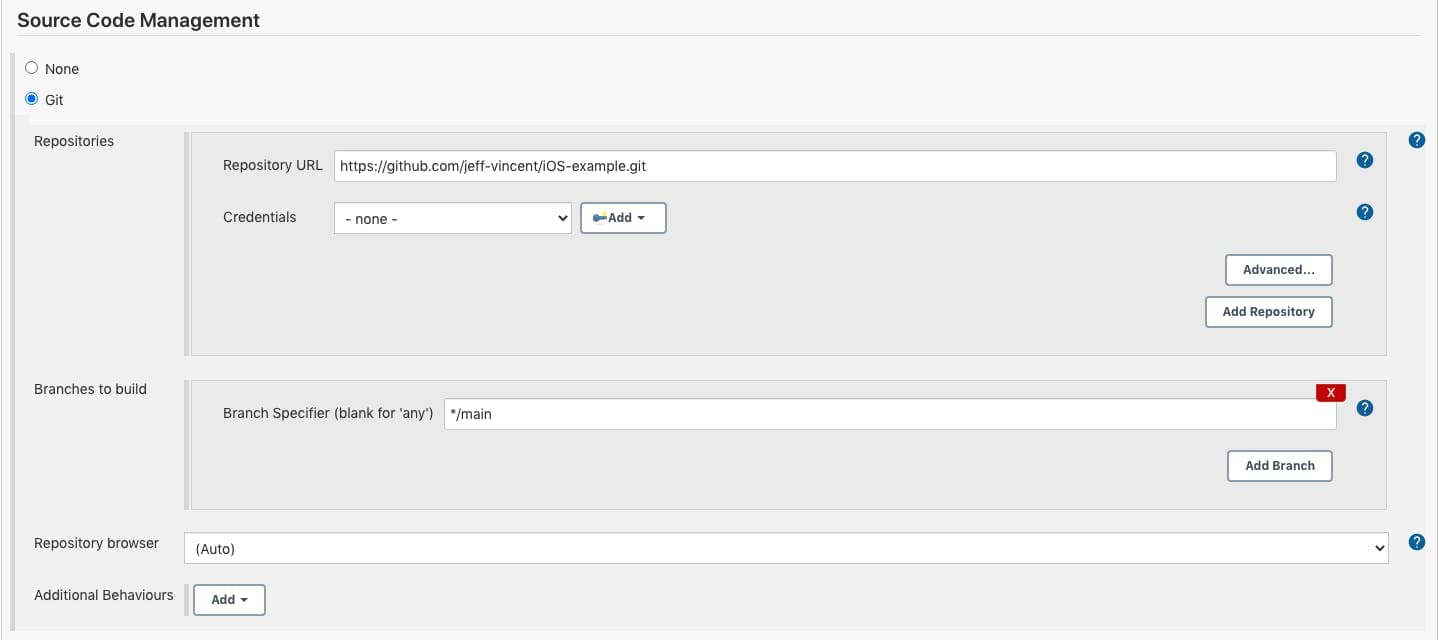
Next, we’ll need to select Git as our source code management tool. We’ll also need to enter the URL from which to fetch the code we’ll be working with, along with the name of the branch we wish to target.
Then, to set up our GitHub webhook, we’ll need to click the GitHub hook trigger for GITScm polling checkbox. This tells Jenkins to listen for incoming calls from GitHub webhooks.

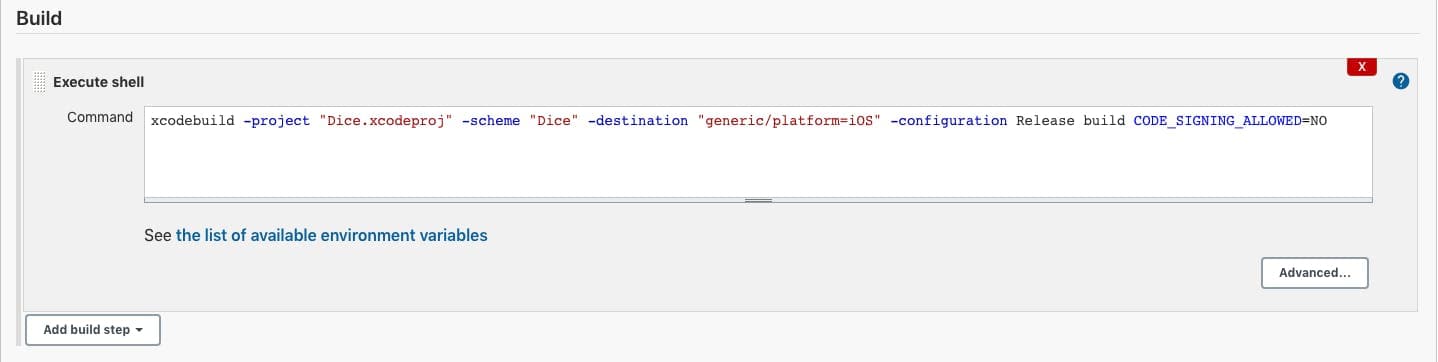
Homestretch! For your pipeline to do anything when it runs, you’ll need to define the commands you’d like to run here. We are executing a simple xcodebuild command here.
GitHub Webhook Setup
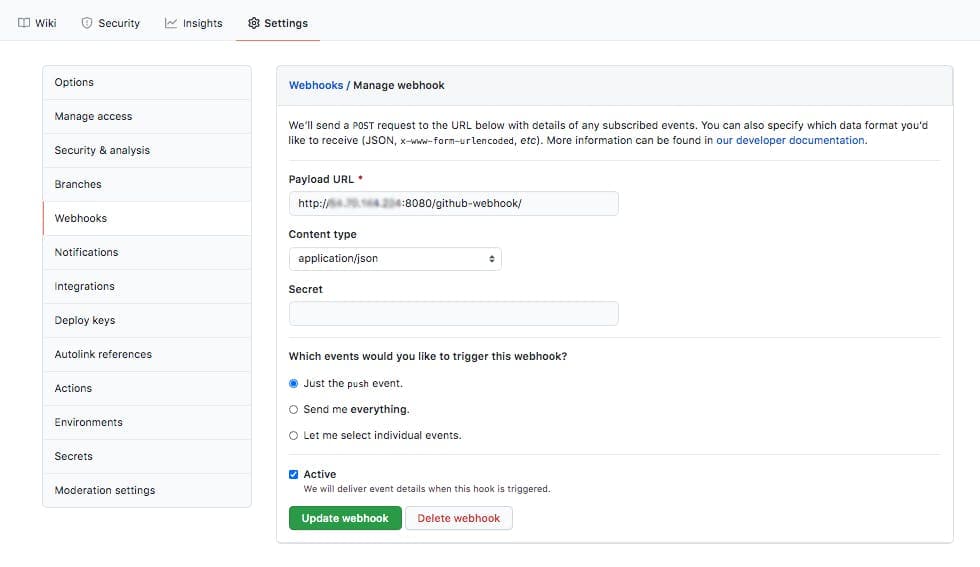
Finally, you’ll need to navigate to your repository in GitHub, click Settings, and then Webhooks. From there, click Add webhook, enter your target URL, and click Add webhook once more.
Example webhook URL:
http://<publicly_accessible_jenkins_server_ip>:8080/github-webhook/
Open Test VPN
First, install Open Connect on the Jenkins EC2 instance:
sudo apt-get update
sudo apt-get install openconnect -y
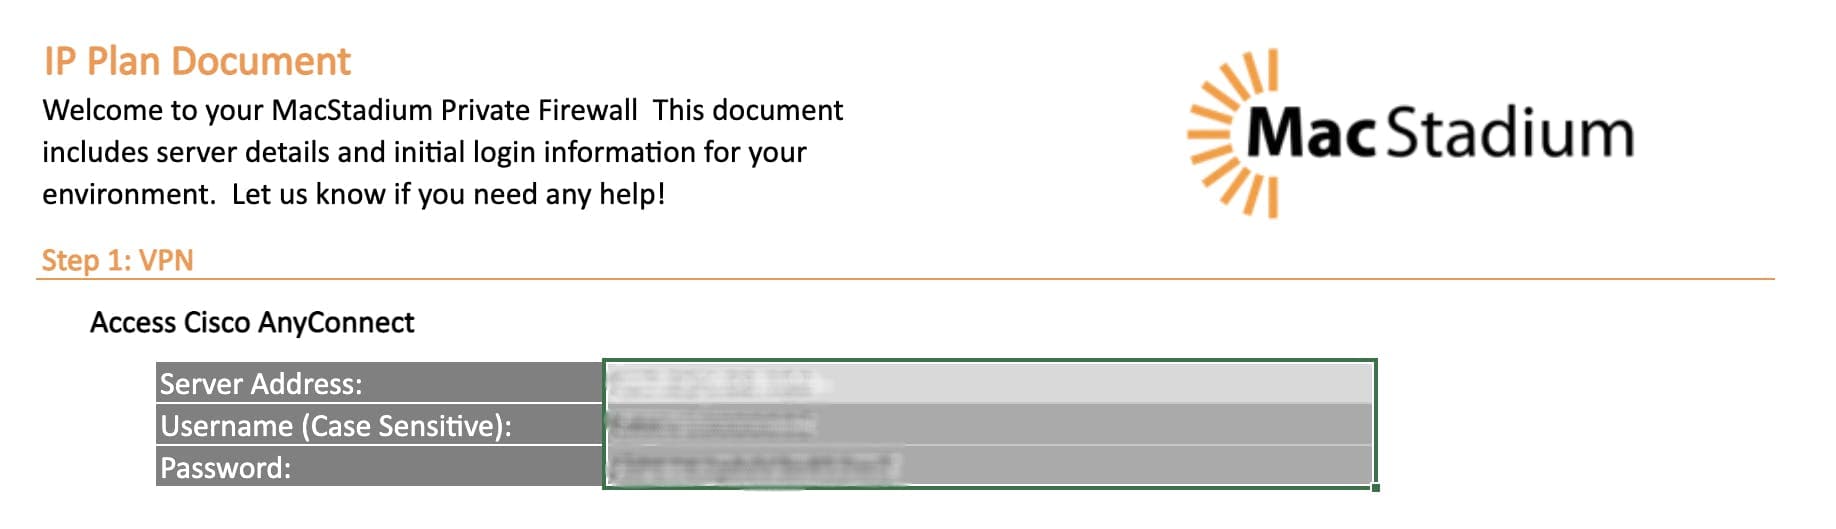
Then, gather your VPN credentials from the IP Plan you received when you signed up for Orka.
Open the VPN connection from the Jenkins EC2 instance to Orka:
sudo openconnect -u <Username> <Server_Address>
Type “yes” when prompted, and then enter your VPN Password to complete the connection.
Execute workflow
Finally, to execute the workflow, push a change to the targeted branch in your repository. When you do, GitHub will send a POST request to your Jenkins server, which will tell it to pull the code down, spin up a macOS VM in Orka, and execute whatever build stages you have defined in the pipeline.
The Orka-Jenkins plugin will finally delete the Jenkins agent and the underlying Orka VM when certain conditions are met – i.e. idle timeout or a defined number of jobs have been run by the agent. This way the plugin ensures resources are freed up once they are no longer being used.
Have additional questions or need more help? Visit our Orka Docs for more info.