How to Run Azure Self-hosted macOS Agents on Apple M1 Mac minis with MacStadium
First released in November of last year, Apple’s ARM-based M1 chip is quickly figuring into development and release planning for macOS and iOS development teams. This is due to the fact that Apple has made clear its intentions of eventually – although not immediately – dropping support for Intel-based machines. What this means for development teams is that they will need to update their CI/CD pipelines to accommodate this M1 hardware.
Thankfully, teams that are using Microsoft Azure’s DevOps solution have a relatively straightforward path to getting this new hardware incorporated into their existing pipeline(s) by self-hosting the Azure DevOps Agent on an Apple M1 Mac mini hosted by MacStadium.
Today, we’ll walk through the process of adding a MacStadium-hosted Apple M1 Mac mini to an Azure DevOps Agent Pool, so that it can execute arm64 builds in your macOS or iOS Xcode pipeline.
Generate a personal access token
Before you begin, you’ll need to generate a personal access token (PAT) for a user with adequate permissions within your Azure DevOps organization. At a minimum, the PAT will need read and manage permissions for Agent Pools scope. You can select Show all scopes at the bottom of the window to see the complete list of possible scopes to set permissions for.
NOTE: You’ll need to copy the PAT when the hash is generated, as it will only be available to view at that point and it won’t be displayed again after this step.

Download and extract the Azure DevOps Agent
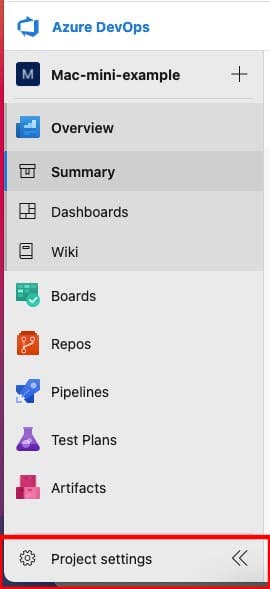
Within your Azure DevOps project, you’ll need to either select an existing agent pool to add your M1 mini to or you can create a new one. To do so, navigate to Project Settings on the left sidebar of the Azure DevOps portal, as shown below.
Next, either select or create the agent pool you intend to use for your iOS or macOS CI/CD workflow by first clicking Agent pools in the left sidebar and then clicking New agent as shown in the following screenshot.
Then, you’ll need to select the macOS agent version and Download the agent onto your M1 mini by clicking Download.
NOTE: if you have not yet done so, you will be prompted to install Rosetta 2 on your Apple M1 machine.
Avoid the code signing error
After downloading, but before extracting the agent, you’ll need to run the following to allow the agent to run on Mac as it is currently distributed:
xattr -c vsts-agent-osx-x64-2.193.0.tar
Complete the installation
You’ll then simply need to run the provided commands on your M1 mini to configure and start the agent. Again, please refer to the following screenshot.

Configure and run the Azure DevOps Agent
After extracting the agent into a newly-created directory, you’ll need to run ./config.sh, as shown above, in order to associate the agent with your organization in Azure DevOps.
When you do, you will see the following dialogue in the terminal:
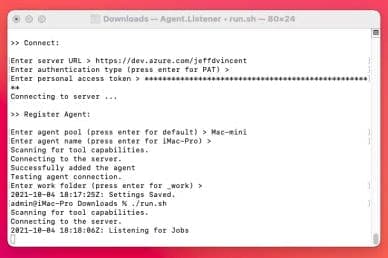
First, you will need to provide the server URL, which is https://dev.azure.com/{organization name}. Next, you can simply press Enter to select PAT as your authentication type, and then finally paste the PAT you collected earlier into the terminal when prompted.
And with that, you’ll be ready to start the agent by running ./run.sh.
Confirming success
After starting the Azure DevOps self-hosted agent for macOS, you should see a “Listening for jobs” dialogue in the terminal. You should also see the new agent listed in the appropriate agent pool in the Azure UI, which will look like the following:

TL;DR
With the November 2020 release of its new ARM-based M1 chip, Apple has made clear its intentions to eventually discontinue support for previous, Intel-based machines. This approaching change means that iOS and macOS development teams will need to update their CI/CD processes to align with Apple’s new hardware. Teams that are currently using Azure DevOps will have a relatively straightforward path to making this change, as the Azure DevOps Agent for macOS currently runs on M1 via Rosetta 2 emulation, which is supported by MacStadium.
Have you made the move to M1? Contact a MacStadium sales engineer to learn more about M1 Mac minis hosted by MacStadium.